
How to Cut and Connect LED Strip Lights? Step By Step Guide
Ready to illuminate your space with the vibrant glow of LED strip lights? This guide will walk you through everything you need to know about how to cut and connect LED strip lights, from understanding the basics to mastering advanced techniques. We’ll cover choosing the right tools, safely cutting the strips, making connections, and troubleshooting…
Ready to illuminate your space with the vibrant glow of LED strip lights? This guide will walk you through everything you need to know about how to cut and connect LED strip lights, from understanding the basics to mastering advanced techniques. We’ll cover choosing the right tools, safely cutting the strips, making connections, and troubleshooting common problems. Whether you’re a beginner or a seasoned DIY enthusiast, you’ll find valuable information here to help you achieve professional-looking results.
How to cut and connect LED strip lights? Cut LED strip lights along the marked cutting lines between copper pads. Use sharp scissors for a clean cut. To connect, align the copper pads with a compatible connector or solder wires directly to the pads, matching the positive and negative terminals for proper polarity and electrical flow.
lights exist, differing primarily in their power source and connection methods. Common types include 12V DC strips, requiring a 12V power supply, and 24V DC strips, offering longer run lengths before voltage drop becomes significant. Some strips are self-adhesive, simplifying installation. Understanding these variations is crucial for selecting the appropriate strips for your project.
How to cut and connect LED strip lights?
Identifying Cut Points and Markings
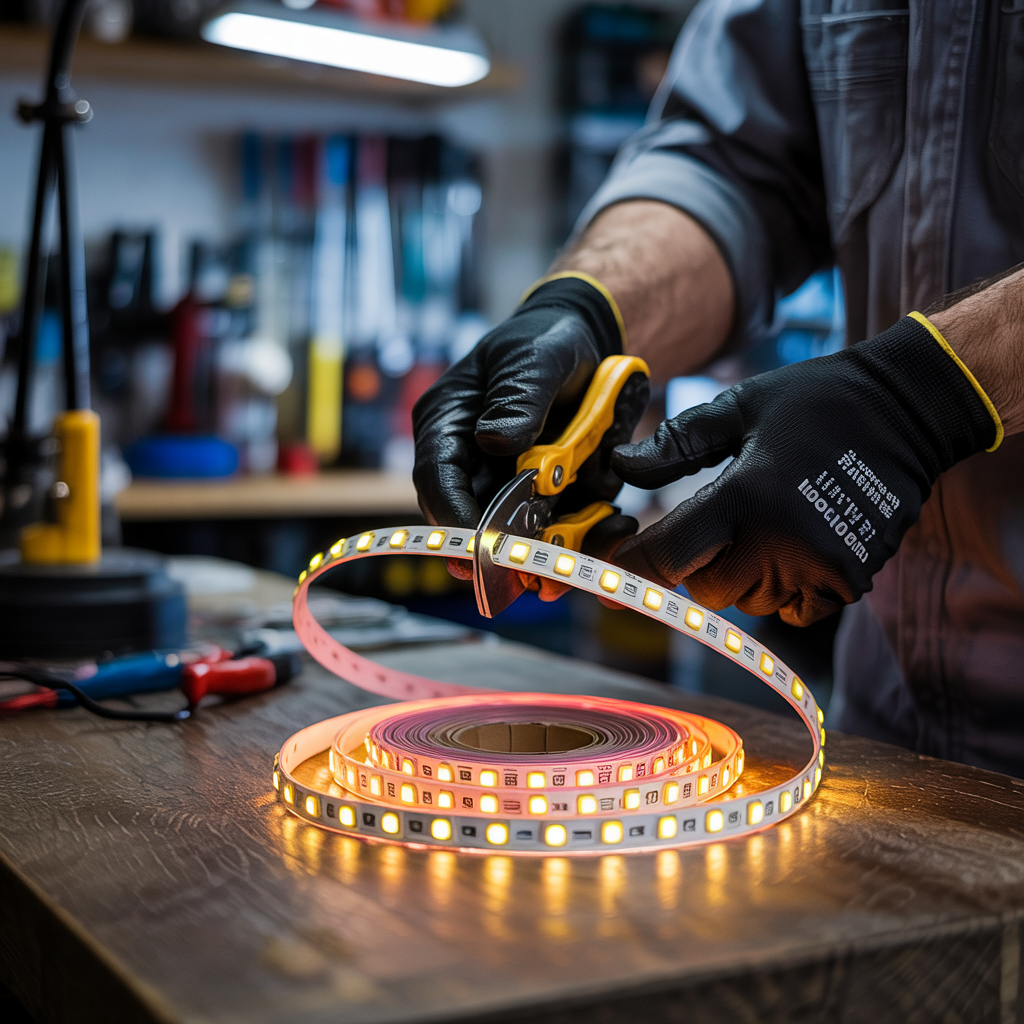
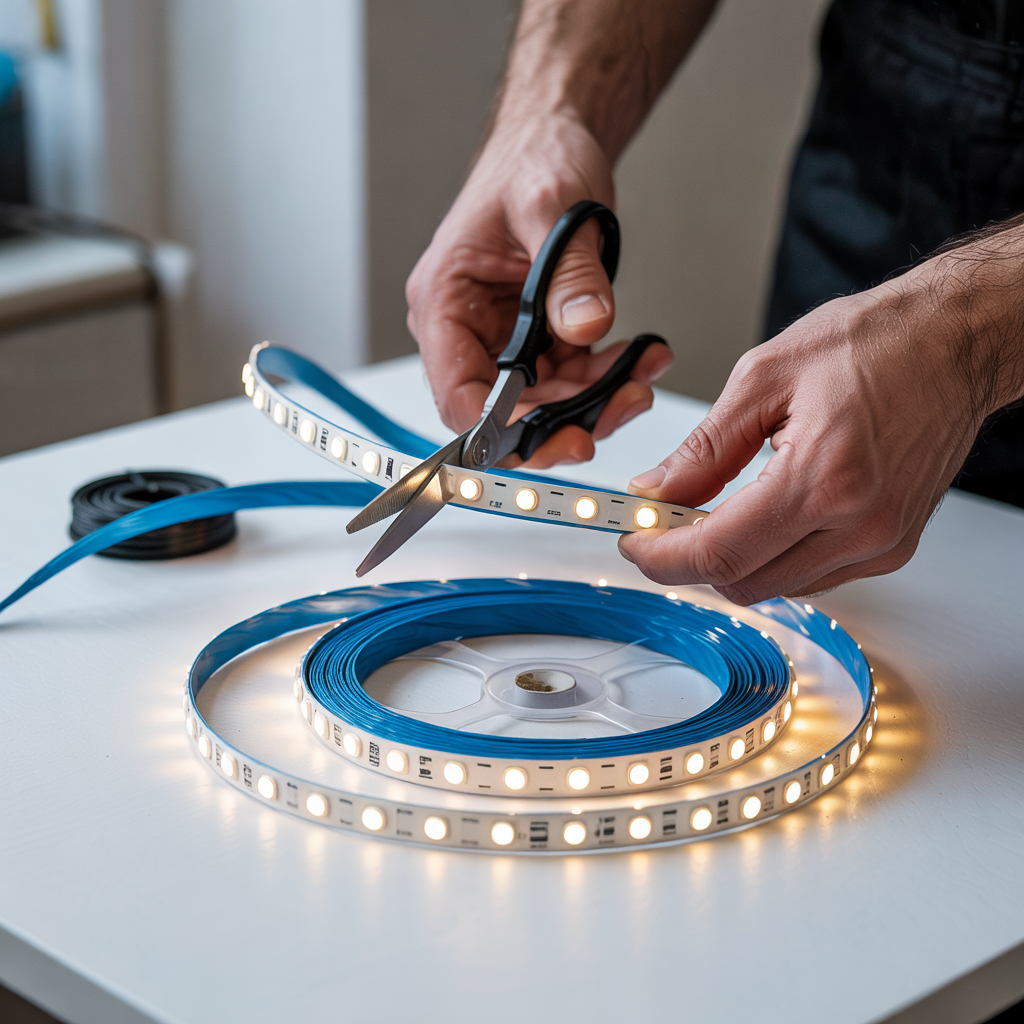
LED strip lights are designed with designated cut points, usually marked by small scissors icons or lines on the PCB (Printed Circuit Board). These markings indicate where you can safely cut the strip without damaging the circuitry. Cutting outside these points can result in damaged LEDs or a malfunctioning strip. Always carefully examine the strip for these markings before proceeding.
Read More: Do LED Lights Attract Bugs? The Complete Guide
Gathering the Necessary Tools
Proper tools are essential for a clean and safe cut. You’ll need a sharp pair of wire cutters or scissors designed for electronics work (avoid using dull scissors, which can crush the conductors). Soldering iron, solder, and a heat-resistant surface will be needed for most connection methods.
The Safe Cutting Procedure
Once you’ve identified the cut points, place the strip on a stable, flat surface. Using your wire cutters or scissors, make a clean, precise cut at the designated location. Avoid bending or flexing the strip excessively during the cutting process. This ensures that you preserve the integrity of the copper traces and prevent damage to the LEDs or connections.
Connecting the LED Strip Lights
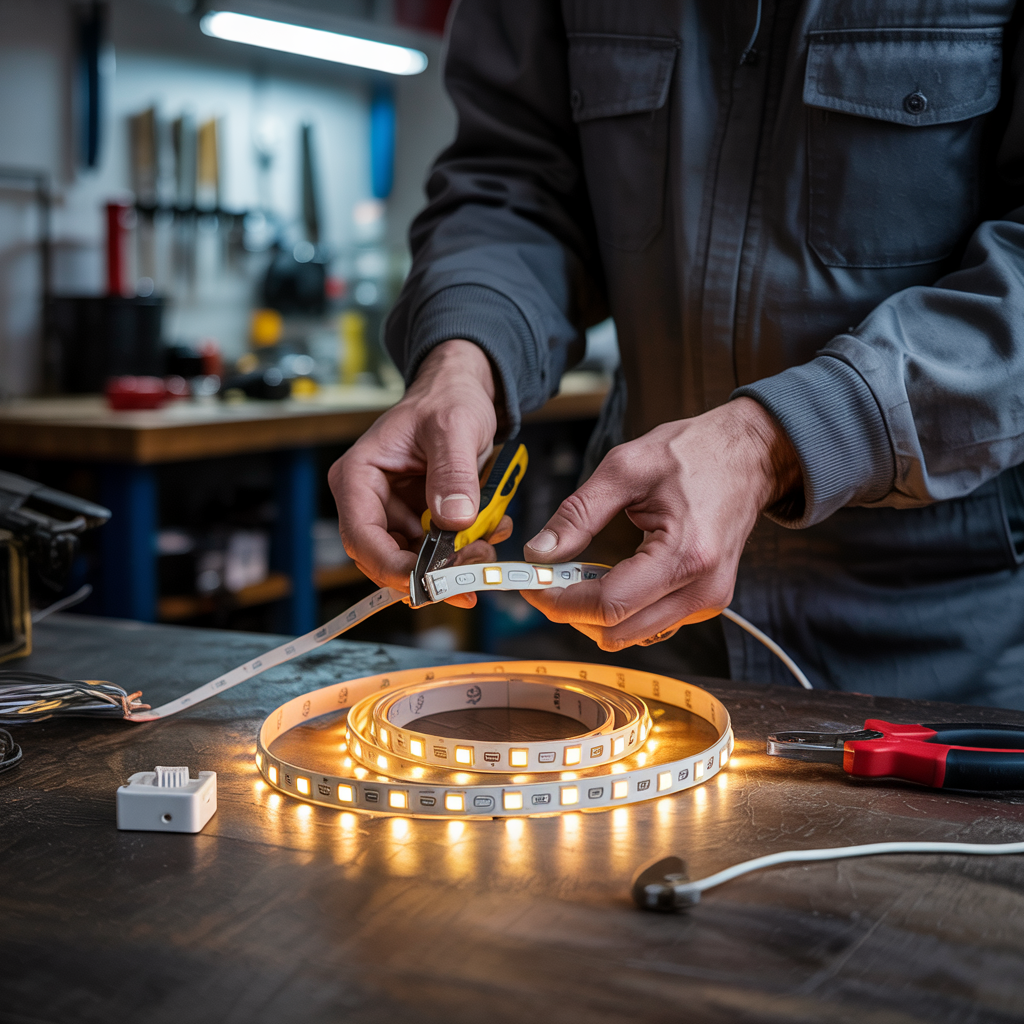
Connecting LED strips usually involves soldering or using connectors. Soldering offers a more robust and reliable connection but requires some skill. Connectors provide an easier, solderless connection but may be less durable over time. Choosing the correct connection method depends on your experience level and the nature of the project.
Read More: Upgrading Your Home Lighting: A Comprehensive Guide To Can Lights LED Retrofit
Soldering LED Strip Lights
Preparing for Soldering
Before soldering, prepare your workspace. Ensure good ventilation and use a heat-resistant surface. Tin the soldering iron tip with solder to ensure smooth heat transfer. Clean the strip’s copper pads with a fine sandpaper or a wire brush, if necessary, to remove any oxidation which could impact connection quality.
Soldering Techniques
Apply a small amount of solder to each copper pad on the cut end of the strip and the corresponding connector wire. Next, quickly and carefully apply the heated soldering iron tip to both the solder and the copper pad, allowing the solder to melt and flow into the copper trace. Remove the iron, allowing the solder to cool and solidify completely before moving on.
Using Connectors
Connectors offer a convenient solderless alternative. Most LED strips use small, push-fit connectors that slide over the copper pads, making the connection secure without the need for soldering. This is particularly useful for beginners or for projects where soldering might be challenging. Always ensure the connectors are firmly seated and that there is good electrical contact.
Testing Your Connections
Before fully installing your LED strip lights, test your connections using your power supply. Carefully connect the power supply to the strip, ensuring the polarity is correct (positive to positive, negative to negative). Check for proper illumination and that all sections of the strip are working correctly. If any segments are not lighting up, revisit your soldering or connector points for faults.
Read More: Cozy Bedroom Lighting Ideas: 15 Ways to Create a Dreamy Retreat
Power Supplies for LED Strip Lights
Selecting the appropriate power supply is crucial. The power supply must match the voltage and amperage requirements of your LED strip lights. Using an incorrect power supply can damage your strips or cause them to fail prematurely. Always check the specifications on your strip lights to select a compatible power supply.
Extending LED Strip Lights
If your LED strip lights are too short for your project, you can extend them using the methods described above for connecting multiple strips together. Remember to account for the increased power draw when extending the length of your installation and choose a power supply that can handle the increased load.
Voltage Drop and Long Runs
As the length of an LED strip increases, the voltage can drop, leading to reduced brightness and potential damage to the LEDs. For longer runs, consider using a higher voltage strip (e.g., 24V) or adding a booster circuit to maintain a consistent voltage throughout the length of the strip. Proper planning prevents potential failures in long installations.
Troubleshooting Common Problems
Troubleshooting involves checking for loose connections, incorrect polarity, damaged LEDs, or insufficient power supply. Inspect your soldering work for cold joints (insufficient solder), and ensure all connectors are securely fitted. Examine the strip for any visible damage to the LEDs or copper traces.
Different LED Strip Light Applications
-
- Under-cabinet lighting
- Accent lighting in living rooms
- Backlighting for TVs and monitors
- Mood lighting in bedrooms
- Custom lighting for vehicles
- Commercial signage and displays
Safety Precautions
Always work with the power supply disconnected to avoid electrical shock. Use proper safety glasses to protect your eyes from any potential hazards when soldering. Ensure adequate ventilation when soldering to avoid inhaling fumes. Follow the manufacturer’s instructions closely and always prioritize safety.
Choosing the Right LED Strip Lights
Consider factors like color temperature (warm white, cool white, or RGB), brightness (measured in lumens), and IP rating (water resistance) when selecting your LED strip lights. Ensure your choice matches the desired aesthetic and environmental conditions of your project.
Comparing Different Brands and Models
Various brands offer LED strip lights with varying quality, features, and prices. Research and compare different brands before making a purchase, considering factors like warranty, customer reviews, and reputation for reliability. Some well-known brands often offer more reliable products due to higher quality components.
Advanced Techniques and Customization
More experienced users might explore advanced techniques like using addressable LEDs (individually controllable LEDs) or creating complex lighting patterns using microcontrollers (like Arduino). This opens up many opportunities for creativity and highly customized lighting solutions.
Frequently Asked Questions
What type of wire should I use to connect LED strip lights?
Use stranded wire of a gauge appropriate for the current draw of the LED strip. A 22-24 AWG wire is generally sufficient for most LED strips.
Can I cut an LED strip light anywhere?
No, you must cut LED strips at the designated cut points marked on the strip itself. Cutting elsewhere will damage the circuit and prevent proper function.
How do I determine the correct power supply for my LED strip lights?
Check the specifications of your LED strip lights, which will indicate the required voltage and amperage. Select a power supply that matches or exceeds these specifications.
What happens if I connect the positive and negative wires incorrectly?
Connecting the wires incorrectly can damage your LED strip lights or the power supply. In some cases, it might even pose a safety risk.
Can I connect different lengths of LED strip lights together?
Yes, you can, but ensure both strips use the same voltage and amperage. Also account for increased power draw on your power supply.
What are the advantages of using connectors instead of soldering?
Connectors offer a solderless, easy connection method, ideal for beginners. However, they may be less durable than soldered connections over time.
What should I do if an LED strip light section isn’t working?
First, check the connections, ensuring the correct polarity and good contact at all joints. Then inspect for damage to the LEDs or traces on the PCB. If it’s a problem with one LED, the strip may be replaceable.
Final Thoughts
Successfully cutting and connecting LED strip lights is an achievable project for many DIY enthusiasts. By following the steps outlined in this guide and using the appropriate tools and techniques, you can transform your living spaces with beautiful, customizable lighting. Remember to prioritize safety and always double-check your connections before powering on your LED strip lights. With patience and attention to detail, you can achieve professional-looking results and enjoy the ambiance created by your new LED lighting installation.
Whether you’re adding subtle accent lighting or creating a vibrant, dynamic display, the versatility of LED strip lights offers endless possibilities. So gather your supplies, follow these instructions, and unleash your creativity.