
How to Fit LED Strip Lights? A Simple & Easy Step By Step Guide
Transforming your space with the warm glow or vibrant colors of LED strip lights is easier than you think! This guide will walk you through everything you need to know about how to fit LED strip lights, from choosing the right type to troubleshooting common problems. We’ll cover selecting the perfect strip lights, preparing your…
Transforming your space with the warm glow or vibrant colors of LED strip lights is easier than you think! This guide will walk you through everything you need to know about how to fit LED strip lights, from choosing the right type to troubleshooting common problems. We’ll cover selecting the perfect strip lights, preparing your surface, adhering the lights, connecting the power supply, and more. By the end, you’ll be ready to illuminate your home with ease.
LED strip lights consist of small LED lights arranged on a flexible circuit board. They are incredibly versatile, offering a wide range of colors, brightness levels, and applications. They are available in various lengths and can be cut to size, making them ideal for customizing any space. Common types include single-color (e.g., warm white, cool white), RGB (red, green, blue, allowing for millions of color combinations), and RGBW (adding white for more natural light options).
How to Fit LED Strip Lights?
From this section you will discover a perfect guide and issues as well as fixing system. So, without talking more let’s get started the article.
Types of LED Strip Lights
The market offers a diverse range of LED strip lights, categorized primarily by their light source and control options. There are single-color LEDs, perfect for ambient lighting, RGB LEDs providing a colorful spectacle, and RGBW offering a wider color spectrum, including natural whites. Furthermore, you can find addressable strips (like WS2812B) allowing for individual LED control, offering sophisticated light patterns and animations, unlike non-addressable strips which control all LEDs as a single unit. Choosing the right type depends entirely on your project and desired effects.
Read More: What Do Red LED Lights Mean? The Real Life Answer
Choosing the Right LED Strip Lights
Selecting the ideal LED strip lights involves considering several factors. Firstly, determine the desired color temperature (measured in Kelvin). Lower Kelvin values (2700K-3000K) represent warmer, more yellowish light, mimicking incandescent bulbs, while higher values (5000K-6500K) produce cooler, bluish light, similar to daylight. Next, consider the required brightness (lumens), choosing higher lumens for brighter illumination. Finally, decide on the power supply, ensuring its voltage and amperage match your LED strip lights’ specifications.
Preparing the Surface for Installation
Proper surface preparation is crucial for a successful LED strip light installation. Ensure the surface is clean, dry, and free of dust, grease, or debris. For best adhesion, use isopropyl alcohol to thoroughly clean the area. Avoid installing on surfaces with excessive heat or vibrations. Different surfaces might require different adhesive methods. For example, textured walls may need additional support like double-sided tape alongside the adhesive already on the strip lights. For surfaces like metal, you might consider using special adhesives designed for metallic surfaces to ensure robust bonding and prevent damage.
Read More: Do LED Lights Help Plants Grow? A Comprehensive Guide To Boosting Plant Growth
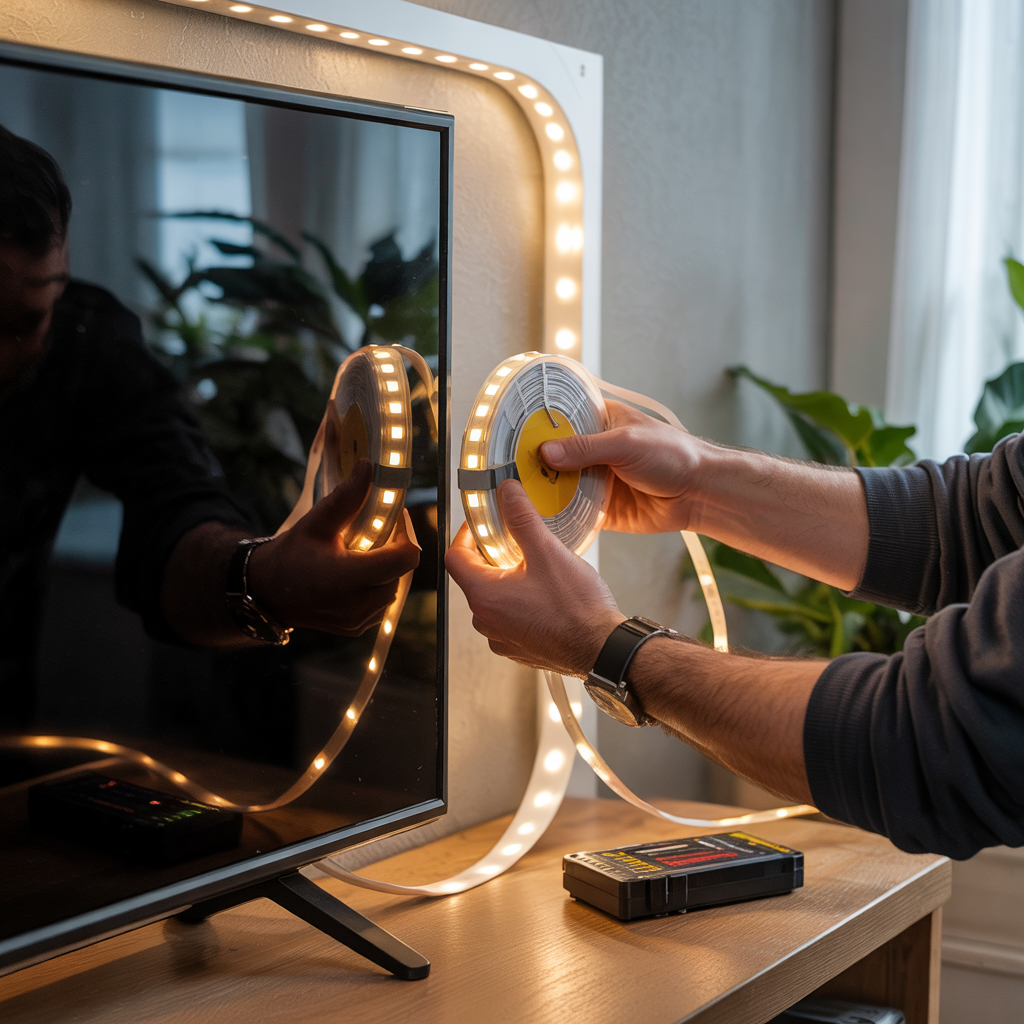
Adhering the LED Strip Lights
Most LED strip lights come with a peel-and-stick adhesive backing. Gently peel off the protective film, ensuring you maintain a firm grip to prevent accidental sticking to unwanted surfaces. Press firmly against the surface, starting at one end and working your way down. Using a smoothing tool like a credit card can ensure the lights make complete contact. Remember to check for any air bubbles and reposition as needed before the adhesive sets firmly. For uneven surfaces, consider using additional adhesive or mounting clips to hold the lights in place securely.
Connecting the Power Supply
Connecting the power supply is crucial and requires careful attention to detail. Match the voltage and amperage of your power supply precisely with those listed on the LED strip lights’ specifications. Ensure that you connect all wires securely to avoid short circuits, and use appropriate connectors to prevent damage or loose connections. Before fully powering on the lights, check the connection again to avoid mishaps. Never exceed the power supply’s rating, as it might overheat or damage the LED lights.
Connecting Multiple LED Strip Light Sections
If your project requires more length than a single strip provides, you can connect multiple sections. However, always check the manufacturer’s instructions regarding joining multiple strips. Using appropriate connectors will ensure a secure and consistent current flow, preventing any disruptions in the lighting. This step requires precision and attention to avoid incorrect wiring, which may result in malfunction or damage to your LED lights. Improper wiring can lead to overheating or even fire hazards, therefore careful adherence to the manufacturer’s instructions is essential.
Cutting LED Strip Lights
Many LED strips feature designated cutting points marked with scissors symbols. These markings indicate where you can safely cut the strip without damaging the circuit. Always cut along these lines, never in between the LEDs. If you cut at an incorrect point, you could damage the circuit and cause a section of the lights not to function. Remember to have the appropriate connectors handy to join multiple sections, ensuring a smooth flow of power across your cut sections.
Read More: 15 Creative Angled Ceiling Lighting Ideas to Brighten Up Sloped Spaces
Troubleshooting Common LED Strip Light Issues
Troubleshooting issues with LED strip lights involves a systematic approach. If the lights don’t work, first check the power supply and connections. Loose connections or incorrect voltage can cause malfunction. Inspect the strip for any visible damage, such as cuts or broken LEDs. If only a portion of the strip is malfunctioning, that could indicate a problem with the individual section rather than the overall power supply.
Hidden Wiring and Installation Tips
For a cleaner look, you can conceal the wiring. Use wire clips or cable channels to neatly route the power supply and controller wires, tucking them away discreetly. It’s crucial to ensure that the wiring is adequately protected, especially in areas susceptible to moisture or heat. Using appropriate protective coverings and adhering to safety guidelines is essential during and after the installation process. This improves the overall aesthetics of your project and prevents potential safety risks.
Choosing the Right Adhesive
The choice of adhesive is crucial for the longevity and stability of your LED strip lights. While many strips come with an adhesive backing, for challenging surfaces or high-weight applications, consider using additional adhesive. Opt for a high-quality adhesive suited for the surface material and environment. Consider factors like temperature resistance and water resistance. Always follow the adhesive manufacturer’s instructions to maximize bond strength and prevent damage to the strip lights or surface.
Safety Precautions During Installation
Safety is paramount during the entire installation process. Ensure you are working in a well-lit environment to avoid accidental cuts or damage to your installation. Always disconnect the power supply before working on the wiring or strip lights. Use appropriate tools and techniques to prevent accidental damage to the LED lights or the surface where you are installing them. Remember, working with electricity requires caution and attention to detail. Never attempt an installation if you are unsure about any aspects of the process.
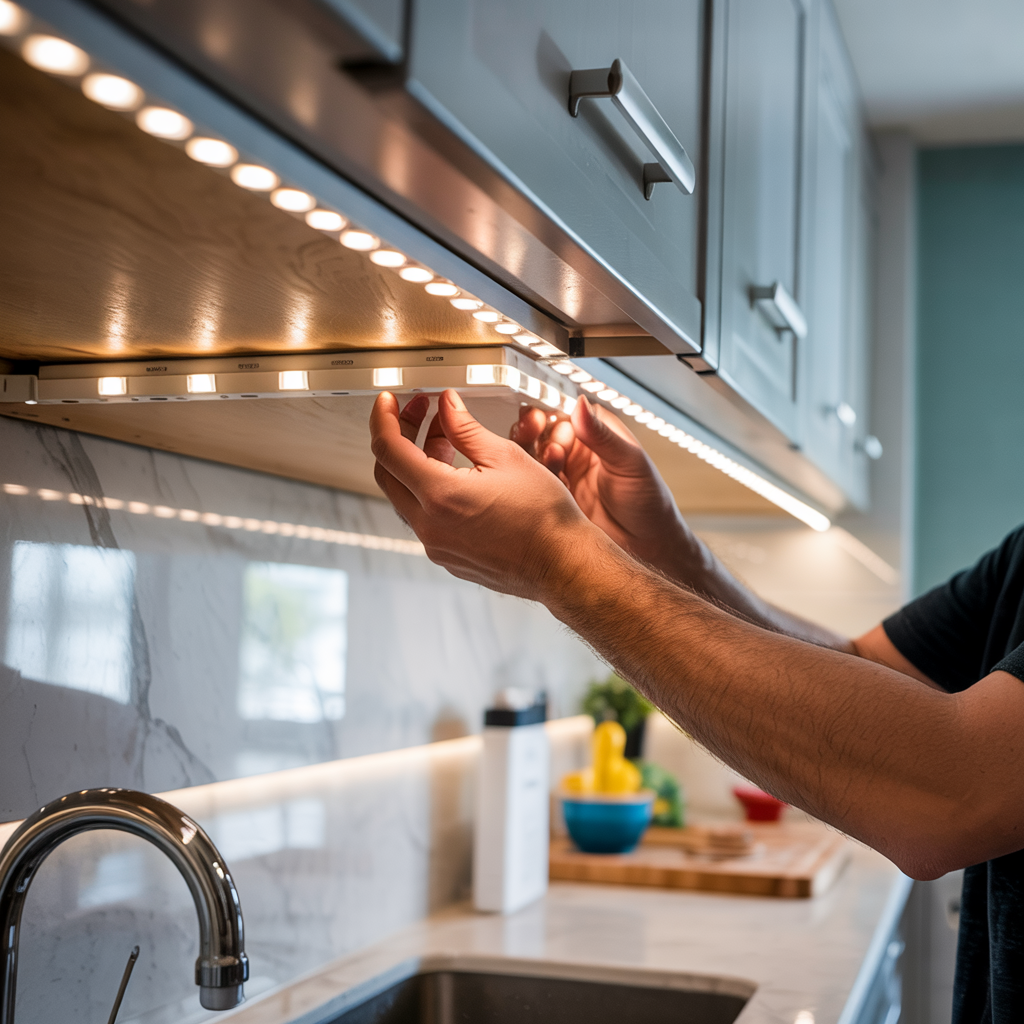
Different Applications of LED Strip Lights
LED strip lights offer remarkable versatility in their applications. They can be used for ambient lighting under cabinets or behind furniture, creating a soft, diffused glow. They can enhance the atmosphere with accent lighting, highlighting architectural features or artworks. Moreover, they can transform any space with creative lighting schemes and customization possibilities. From simple under-cabinet lighting to sophisticated RGB setups, the applications are nearly limitless. Their flexible nature allows for creative installation in tight or awkward spaces.
Comparing LED Strip Lights to Other Lighting Solutions
When compared to traditional lighting solutions, LED strip lights offer several advantages. They are energy-efficient, consuming significantly less power than incandescent or fluorescent bulbs. They have a long lifespan, reducing the frequency of replacements. Their compact size and flexibility make them ideal for versatile installations, often unattainable with other lighting types. While the initial investment might seem slightly higher, the long-term savings and flexibility often outweigh the initial cost. However, traditional solutions like pendant lights might offer a different aesthetic, depending on your design goals.
Maintenance and Care of LED Strip Lights
Maintaining LED strip lights is generally straightforward. Avoid bending or flexing the strips excessively, as this can damage the delicate circuitry. Protect them from excessive moisture or heat. Regularly check the connections to ensure they remain secure. With proper care, your LED strip lights can provide years of reliable illumination.
Cost Comparison and Budget Planning
The cost of LED strip lights can vary significantly based on factors like length, type (single-color, RGB, RGBW), features, and brand. Budget appropriately by considering all necessary components, including the LED strips, power supply, controller, and any additional accessories like connectors or adhesives. Comparing prices from different retailers can help you find the best value for your investment. Consider your project scope and choose lights accordingly. Remember to factor in potential installation costs if you are not doing the installation yourself.
Frequently Asked Questions
What are the most common causes of LED strip lights failing to work?
The most frequent causes are loose connections, power supply issues (incorrect voltage or amperage), damage to the strip lights themselves, or a faulty controller (for RGB or addressable strips). Carefully inspect all connections and ensure the power supply matches the strip’s specifications. If you’ve checked these components, consult the manufacturer’s warranty for possible repairs or replacements.
How long do LED strip lights typically last?
The lifespan of LED strip lights is highly variable depending on their quality and usage. However, with proper use and maintenance, high-quality strips can generally last for 30,000 to 50,000 hours or more. Lower-quality strips might have a shorter lifespan, potentially lasting only a few years, highlighting the need for careful consideration during purchasing.
Can I use LED strip lights outdoors?
While some LED strip lights are designed for outdoor use (look for IP65 or higher ratings), it’s crucial to choose appropriately rated lights. Regular indoor strips are not suitable for outdoor environments due to the risk of water damage, which can lead to malfunctions or short circuits. Always check the IP rating to ensure suitability before installation in an outdoor setting.
Are LED strip lights dimmable?
Dimmability varies by model. Some LED strip lights are dimmable, allowing for customized brightness control, often through a dimmer switch or controller. However, not all strips support dimming, so it’s crucial to check the product specifications beforehand, as attempting to dim non-dimmable strips could result in damage.
Final Thoughts
Installing LED strip lights can transform your home’s ambiance, adding a touch of elegance and functionality. This comprehensive guide has equipped you with the knowledge and steps to undertake this project successfully. From selecting the appropriate lights and preparing the surface to connecting the power supply and troubleshooting potential issues, you’ve learned the essentials. Remember to prioritize safety, double-check all connections, and choose high-quality materials for a long-lasting installation. With a little patience and attention to detail, you can enjoy the benefits of stylish, energy-efficient LED strip lights for years to come. So grab your tools, choose your desired lighting scheme, and get ready to illuminate your space!