
How to Install LED Recessed Lighting In Existing Ceiling? A Comprehensive Guide
Upgrading your home’s lighting can dramatically improve its ambiance and energy efficiency. One popular choice is recessed LED lighting, offering a sleek, modern aesthetic and significant energy savings. But installing these lights in an existing ceiling can seem daunting. This comprehensive guide will walk you through the entire process, from planning and purchasing to installation…
Upgrading your home’s lighting can dramatically improve its ambiance and energy efficiency. One popular choice is recessed LED lighting, offering a sleek, modern aesthetic and significant energy savings. But installing these lights in an existing ceiling can seem daunting. This comprehensive guide will walk you through the entire process, from planning and purchasing to installation and troubleshooting, ensuring you can successfully illuminate your home with stunning LED recessed lighting. We’ll cover everything you need to know, making this seemingly complex task achievable for even the most novice DIY enthusiast.
How to install LED recessed lighting in existing ceiling? Turn off power. Mark light placement on the ceiling. Cut holes using a drywall saw. Run wiring from power source to each hole. Connect wires to LED housings. Insert housings into the ceiling and secure. Attach LED trim. Restore power and test each light for proper function.
Recessed LED lighting, also known as downlights or can lights, fits flush into your ceiling, providing a clean and modern look. These lights use Light Emitting Diodes (LEDs), which are energy-efficient and long-lasting compared to traditional incandescent or halogen bulbs. They’re a popular choice for kitchens, bathrooms, living rooms, and hallways.
How to Install LED Recessed Lighting In Existing Ceiling?
Why Upgrade to Recessed LED Lighting?
There are numerous reasons to choose recessed LED lighting. Beyond their aesthetically pleasing design, they offer significant energy savings, a longer lifespan (reducing replacement costs), and produce less heat than incandescent bulbs, improving safety and energy efficiency.
Read More: 15 Front Porch Ceiling Lighting Ideas: Brighten Up Your Welcome
Key Features of Recessed LED Lights
Modern recessed LED lights offer various features. Look for adjustable trims to direct the light, dimmable options for customized ambiance, and various color temperatures (measured in Kelvin) to suit different rooms. Color temperature ranges from warm white (2700K) to cool white (5000K) and even daylight (6500K).
Planning Your LED Recessed Lighting Installation
Assessing Your Ceiling
Before you start, carefully inspect your ceiling. Determine the type of ceiling material (drywall, plaster, etc.) and ensure there are no obstructions like pipes or wiring in the areas where you plan to install the lights. You’ll need to identify the joists to ensure proper fixture placement.
Choosing the Right Lights
Select lights with the appropriate wattage and color temperature for each room. Consider the size of the recessed housing (the “can”) to fit your ceiling’s construction. Check the junction box requirements – ensure the existing boxes are suitable or plan to install new ones if needed.
Gathering Your Tools and Materials
You’ll need a variety of tools, including a stud finder, hole saw (the correct size for your lights’ housing), wire connectors, voltage tester, screwdriver, level, and potentially a reciprocating saw or drywall saw for cutting larger holes.
Read More: How to Convert 4ft Fluorescent Light to LED? Easiest Way
Step-by-Step Installation Guide

Locating Ceiling Joists
Use a stud finder to locate the ceiling joists. This is crucial to avoid damaging them and ensure secure mounting for the lights. Mark the joist locations with a pencil.
Cutting the Holes in Your Ceiling
Carefully use a hole saw attachment on a drill to create precisely sized holes in your ceiling, centered over the joists. Work slowly and steadily to prevent chipping or cracking the drywall.
Wiring the Recessed Lights
Connect the wires from your new LED lights to the existing ceiling wiring using wire connectors. Ensure proper wire connections (black to black, white to white, and ground to ground) before securing the connections.
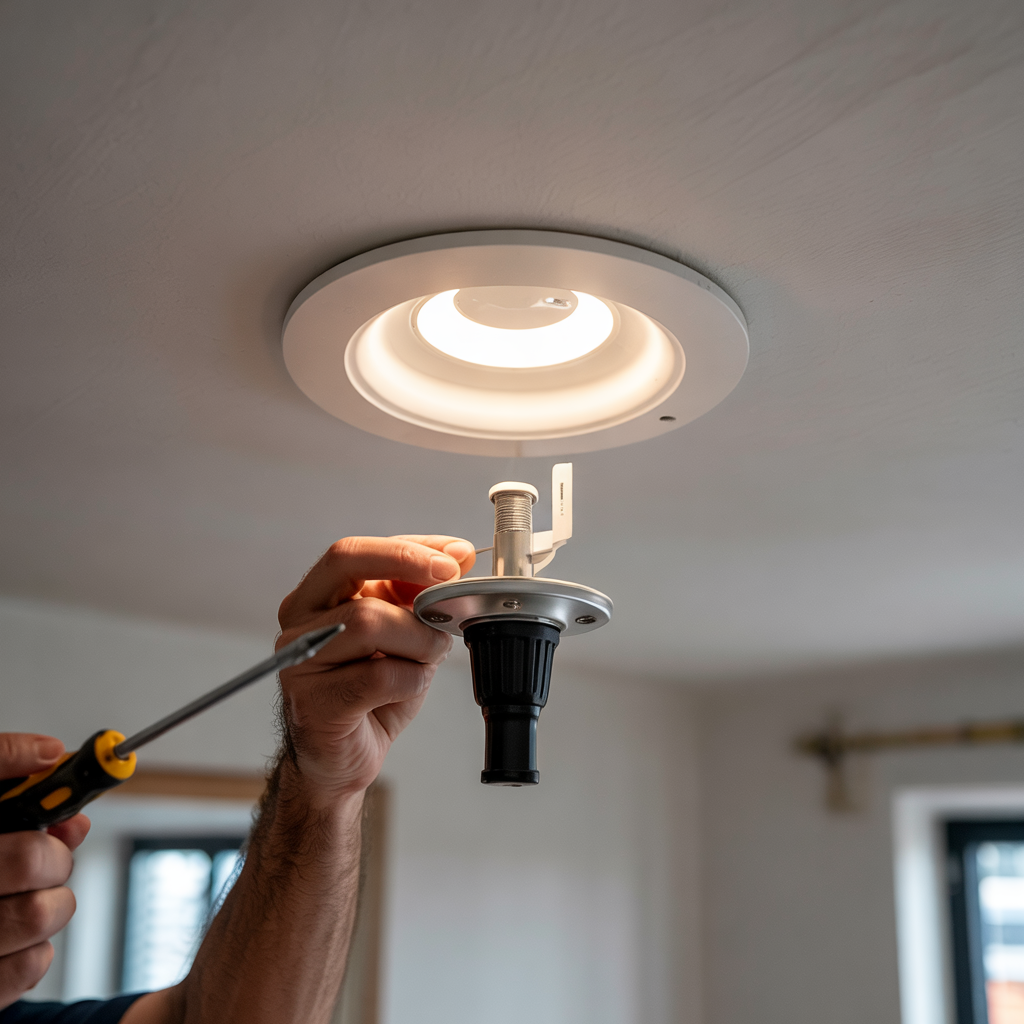
Installing the Recessed Housing
Carefully insert the recessed housing into the hole. Secure it to the ceiling joists using appropriate fasteners. Level the housing to ensure a flush fit before proceeding.
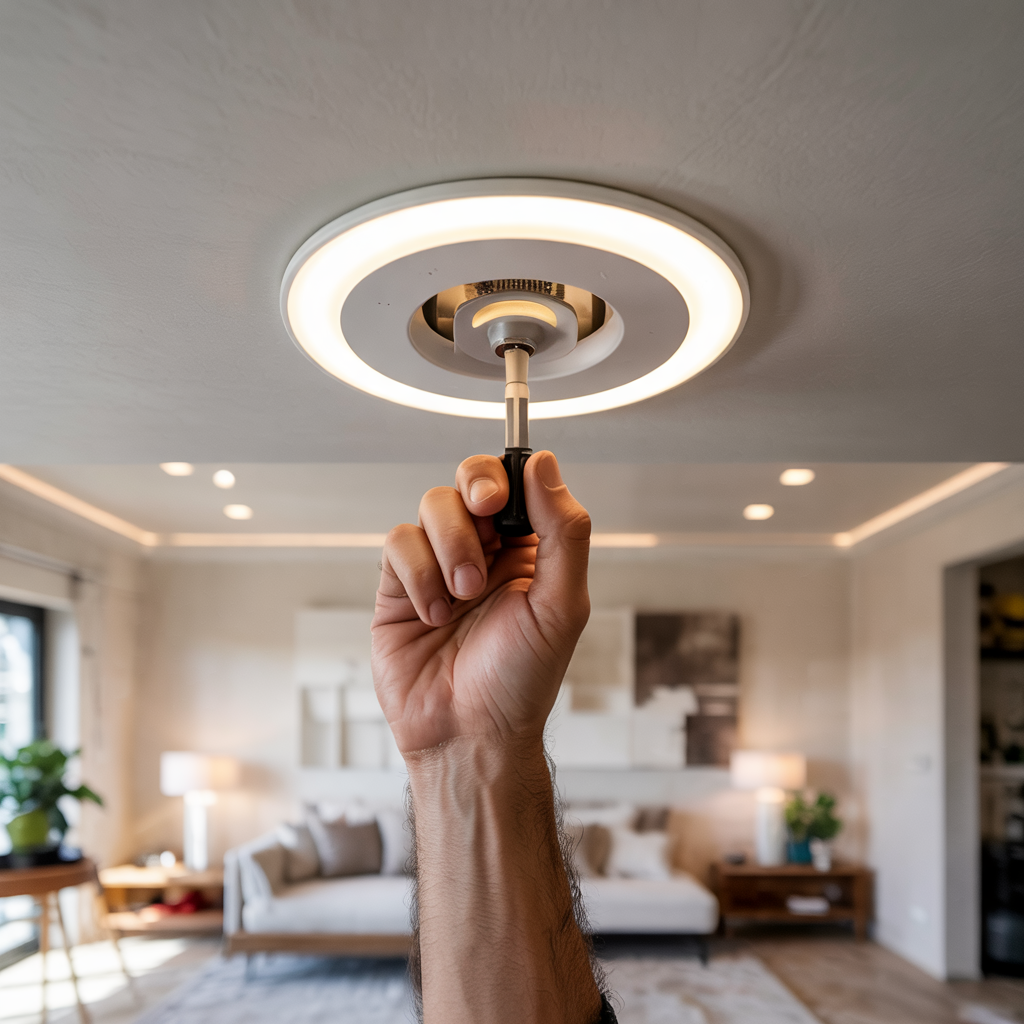
Mounting the LED Light Fixtures
Connect the LED light fixture to the housing. This usually involves snapping or screwing the fixture into place. Ensure it’s securely connected and properly aligned.
Testing Your New Lighting
Turn on the circuit breaker to test your new LED recessed lights. Verify that they are functioning correctly and that the light output and color temperature meet your expectations.
Read More: How to Connect LED Lights Together Without Connector? A Simple Step Need To Follow
Troubleshooting Common Installation Problems
Light Fixture Doesn’t Turn On
Check the circuit breaker, wiring connections, and the LED bulb itself to ensure everything is properly connected and functioning. A voltage tester can help pinpoint electrical issues.
Flickering Lights
Flickering can be caused by loose wiring, a faulty dimmer switch (if used), or insufficient power supply. Tighten connections and check the dimmer compatibility.
Loose or Unstable Fixture
Ensure the recessed housing is securely attached to the ceiling joists. Use appropriate fasteners for your ceiling type. Re-mount the fixture if needed.
Benefits of LED Recessed Lighting
LED recessed lighting offers numerous benefits, including energy efficiency (reducing electricity bills), longer lifespan (reducing replacement frequency), improved lighting quality (reducing glare and shadows), and enhanced home aesthetics.
Limitations of Recessed LED Lighting
Installation can be more complex than other lighting options, requiring some DIY skills or professional assistance. The initial cost might be higher than some simpler lighting solutions, but long-term cost savings make it worthwhile.
Choosing the Right Wattage and Color Temperature
Wattage determines brightness, while color temperature affects the light’s “warmth” or “coolness.” Higher wattage means brighter light, and lower Kelvin values indicate warmer light (yellowish tones), while higher Kelvin values indicate cooler light (bluish tones).
Comparing LED Recessed Lights with Other Lighting Options
Compared to incandescent or halogen bulbs, LED recessed lights offer significant energy savings, longer lifespan, and less heat generation. Compared to surface-mounted lights, they provide a cleaner, more integrated look.
Safety Precautions During Installation
Always turn off the power at the breaker box before starting any wiring work. Use a voltage tester to double-check that the power is off before handling any wires. Wear safety glasses to protect your eyes from debris.
Maintaining Your LED Recessed Lighting
Regular dusting or cleaning of the light fixtures will help maintain their brightness and efficiency. Handle the fixtures carefully to avoid damage.
Advanced Installation Techniques
Working with Different Ceiling Types
This section would delve into specific techniques for installing in various ceiling materials, such as plaster ceilings, dropped ceilings, or ceilings with insulation.
Installing Dimmable LED Lights
This would detail the specifics of wiring and using dimmers for LED lights, including compatibility issues and potential problems.
Frequently Asked Questions
What type of hole saw should I use?
The hole saw size depends on the diameter of your recessed lighting housing. Always check the manufacturer’s specifications for the exact size needed.
Can I install recessed lighting myself?
While it’s possible for DIY enthusiasts with some basic electrical knowledge, it’s essential to prioritize safety and only proceed if you feel confident. If unsure, consult a qualified electrician.
How do I determine the correct wattage for my room?
The required wattage depends on the room’s size and desired brightness. Online calculators and lighting guides can help determine the appropriate wattage for your needs.
What is the lifespan of LED recessed lighting?
LED lights have a significantly longer lifespan than traditional incandescent or halogen bulbs, typically lasting 25,000 to 50,000 hours or more. This translates to many years of reliable service.
How much does it cost to install recessed lighting?
The cost varies depending on the number of lights, materials, labor costs (if hiring an electrician), and the complexity of the installation.
What if I encounter unexpected obstacles during installation?
If you encounter unforeseen issues like unexpected wiring or structural problems, stop work and consult a qualified electrician to prevent damage or injury.
Can I use a dimmer switch with my LED recessed lights?
Many LED lights are dimmable, but it’s crucial to check the compatibility of your lights and dimmer switch. Use a dimmer specifically designed for LED lights to avoid issues.
Final Thoughts
Installing LED recessed lighting in your existing ceiling can significantly enhance your home’s ambiance and energy efficiency. While it may seem challenging, by following this guide and prioritizing safety, you can successfully complete this project. Remember to carefully plan your layout, gather the correct tools and materials, and follow the step-by-step instructions. If you encounter any difficulties or feel uncomfortable working with electricity, it’s always best to seek professional assistance. The result—a beautifully illuminated home with energy-efficient, long-lasting lights—will be well worth the effort.